With a surge of new Sonic Colours speed strategies and a new generation of runners to cultivate, sometimes us older runners forget about the fundamental skips that have existed in the full-game runs for years.
It’s time to put the foundation back down to help people enter the fray of Colours in the smoothest way possible.
In the near future, we will be reviewing ALL of the ABSOLUTE must-haves for an up-and-coming runner’s Personal Best. These are your bread and butter, the skips that unquestionably need to go as intended, without fail!
Starting Starlight With A Skip
We’ll be starting with a skip that doesn’t necessarily have as much flexibility and safety as others, but one where the main idea is avoiding a few set things happening on your way to success.
Starlight Carnival Act 1; 20 seconds saved is no small feat, putting the SC1 skip in the high leagues of the game’s glitch arsenal. There is no returning from the titanic 45 seconds of time loss if you miss it, but once the trick is properly understood, this skip should start to come extremely naturally.
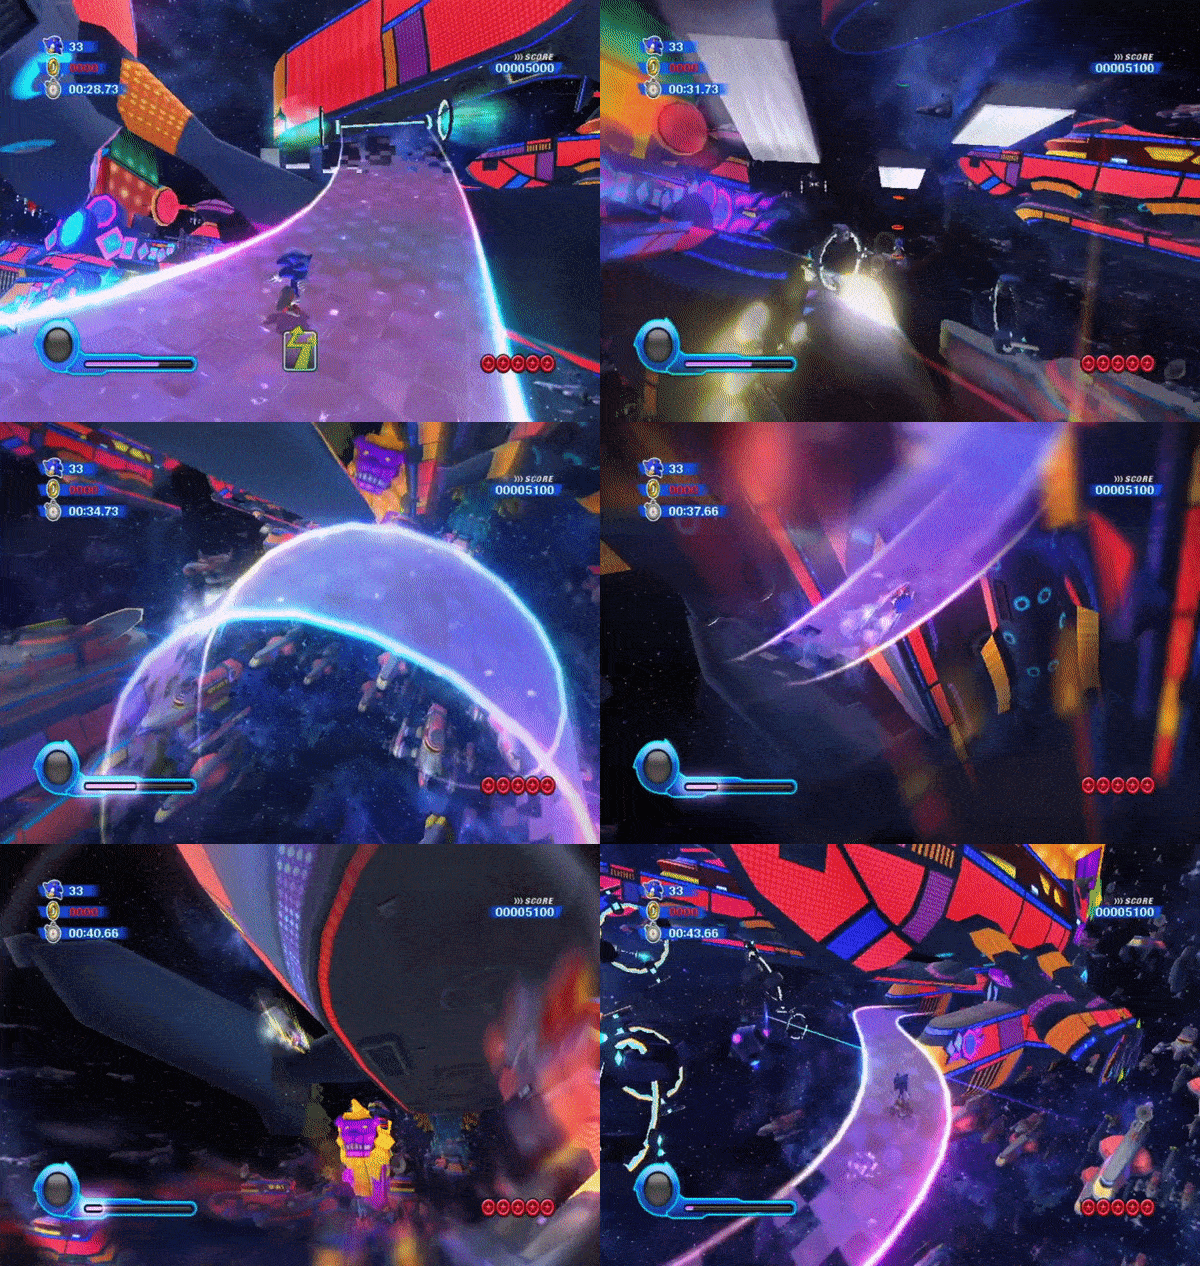
The whole idea is that by boosting across a large gap under the spaceship, you can land on the pathway that you’d otherwise land on upon exiting the internal spaceship, skipping the entire 2D section within.
To get the ability to jump that gap though, a bit of set up is required. Observe Ex.1 EXTREMELY closely. This is what absolute success looks like.

How To Mess It Up
As seen in Ex.1, the skip itself starts well before the jump in question.
You need to achieve 2 things in the first step:
- Pass through the trigger to activate the first rainbow pathway.
- Pass ABOVE the auto-scrolling trigger that you would land on if you went through the orange rings.
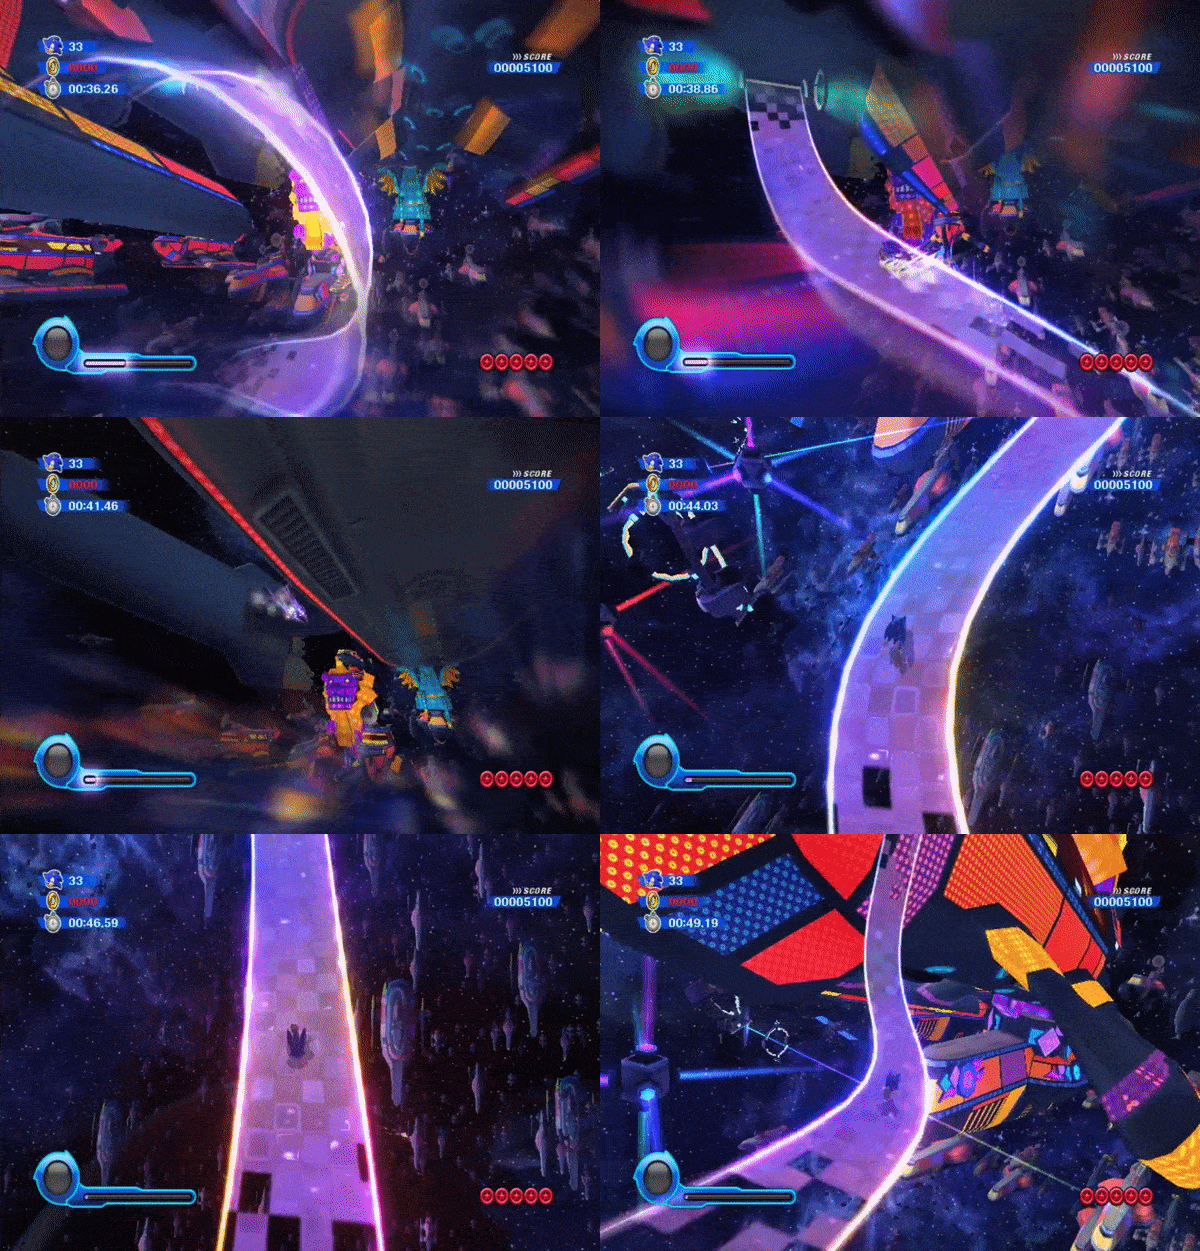
To do this, wait a tick after the opening homing attack, then boost forward. As you start to approach the rainbow pathway area, release boost and swing slightly right. If done correctly, you will get sucked onto the pathway as it appears and you will be left in an odd state where the running angle needed to advance will constantly change with the camera. (Ex.2A)
There are two things that can go wrong here. One is undershooting your boost so you become stuck to the Auto-Run trigger, which removes all control until you are inside the spaceship. (Ex.2B)
The other is a misaligned shot, yielding no pathway, thus no suction. (Ex.2C) The path is still there, just invisible, and it remains to be seen if this can really still be clutched out in an IL setting. Regardless, this is the end of your single-segment’s skip attempt, unquestionably.


The simple solution to the oddities with the angles once you’ve safely landing back on the rainbow path with full control is to release the control stick and hold boost. (as seen in Ex.1)
Hold boost for the entirety of the pathway, because you can still fall off the inverted loop as you move along it if you aren’t keeping yourself planted with the boost state.
Once you reach the fated slope where the major jump happens, release boost BEFORE you start running up the slope. Once halfway up the incline, hold an angle to pull away from the path once you jump. The best angle to use to ensure the highest detachment rate is directly backwards from Sonic’s perspective, so a South-East angle.
Jump just after you hold the angle to go airborne. While jumping too early can make the trick much riskier, jumping too late is just as fatal. Do everything you can to avoid the end of the slope, where a trigger will throw you upwards into the internal area. (Ex.3A)
From here, directions are quite simple; Gather as much height from the initial jump as you can and boost as directly towards the column of rings in the distance as you can. Keep in mind that the natural camera angle is slightly skewed, so it is easy to misinterpret the correct spot to aim for, which will usually end in missing the target path on the other side. (Ex.3B)


As seen all the way back in Ex.1, a clean jump will result in you hitting the auto-running trigger on the other side of the great chasm, wrapping up your Starlight Carnival 1 skip as a success.
Of note, you can activate the second rainbow pathway while still clearing over the trigger, leaving you in the same state as mentioned earlier. Worry not, you’re still in the clear. Turn around and boost to hit the trigger and continue on your way. (Ex.4)

That’s everything you’d ever need to know about the Starlight Carnival 1 Spaceship skip!
For sneak previews and news, follow on Twitter at @GlitchingIsArt and be sure to follow the official GlitchingIsArt Twitch account to see some of these tricks put to use in runs, plus much more!
Regular streams starting up in the near future!

Leave a comment